Weekend Project: Transform a Blank Wall Into a Gallery Wall
You stare at that empty wall every day, knowing it has potential but feeling overwhelmed by where to start.
Gallery walls seem intimidating, but they’re actually perfect weekend projects that can completely transform your space.
You don’t need expensive art or professional design skills to create something stunning.
With the right approach, you can turn any blank wall into a curated display that reflects your personality and elevates your home’s style.
Start With Your Vision and Space Assessment
Before you hammer a single nail, take time to envision what you want your gallery wall to achieve.
Do you want to create a cozy reading nook, add personality to a hallway, or make a bold statement in your living room? Your vision will guide every decision that follows.
Measure your wall space carefully. You’ll want to leave at least 6-8 inches of space around your gallery wall arrangement.
This breathing room prevents the display from looking cramped against furniture or architectural elements.
Consider the wall’s location and lighting. You might need to adjust your artwork choices based on these factors.
Natural light can fade artwork over time, while artificial lighting can create glare on glass frames.
Think about the room’s existing color palette and style. Your gallery wall should complement, not compete with, your current décor.
This doesn’t mean everything needs to match perfectly, but there should be some unifying elements that tie it all together.
Gather Your Artwork and Display Pieces
You don’t need to spend a fortune on original artwork to create an impressive gallery wall.
Start by collecting pieces you already own – family photos, prints, postcards, or even interesting fabric swatches can work beautifully when properly framed.
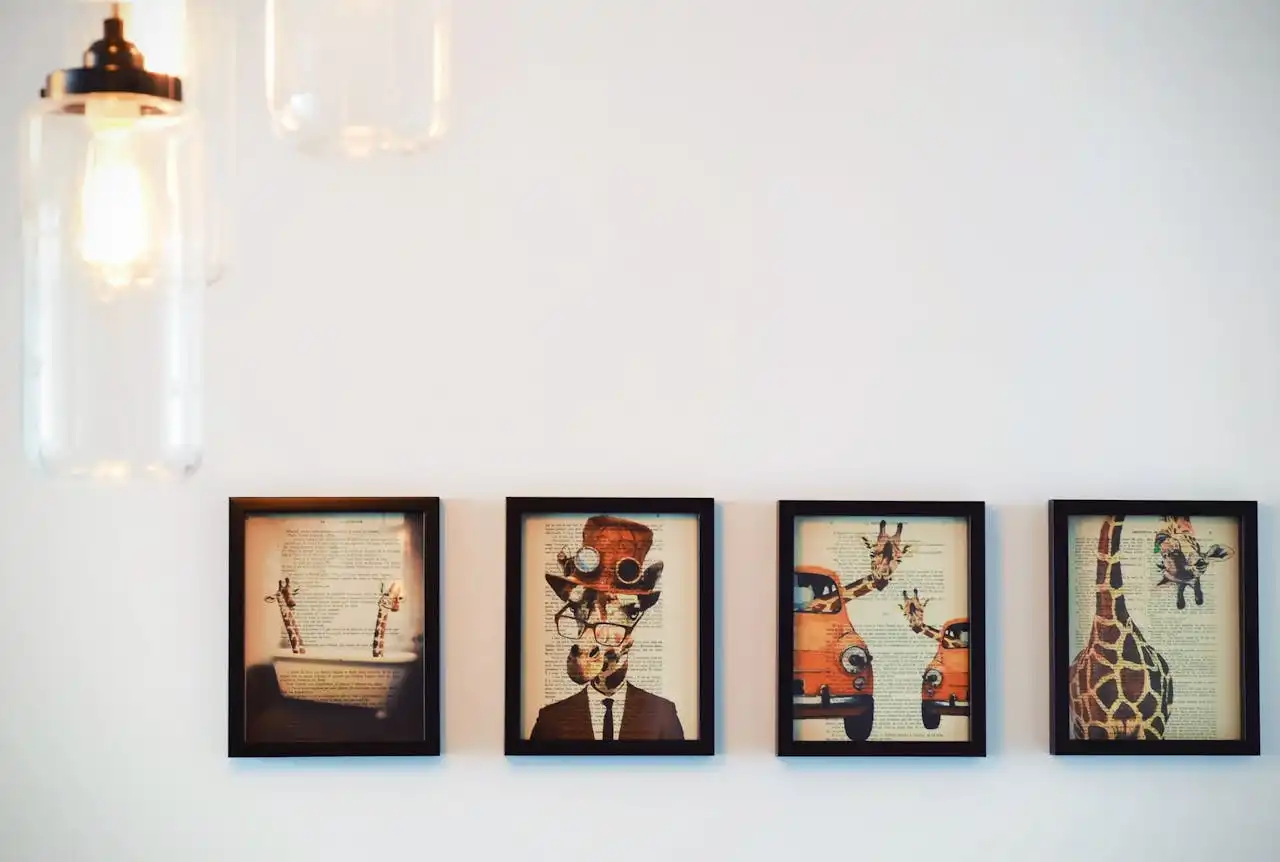
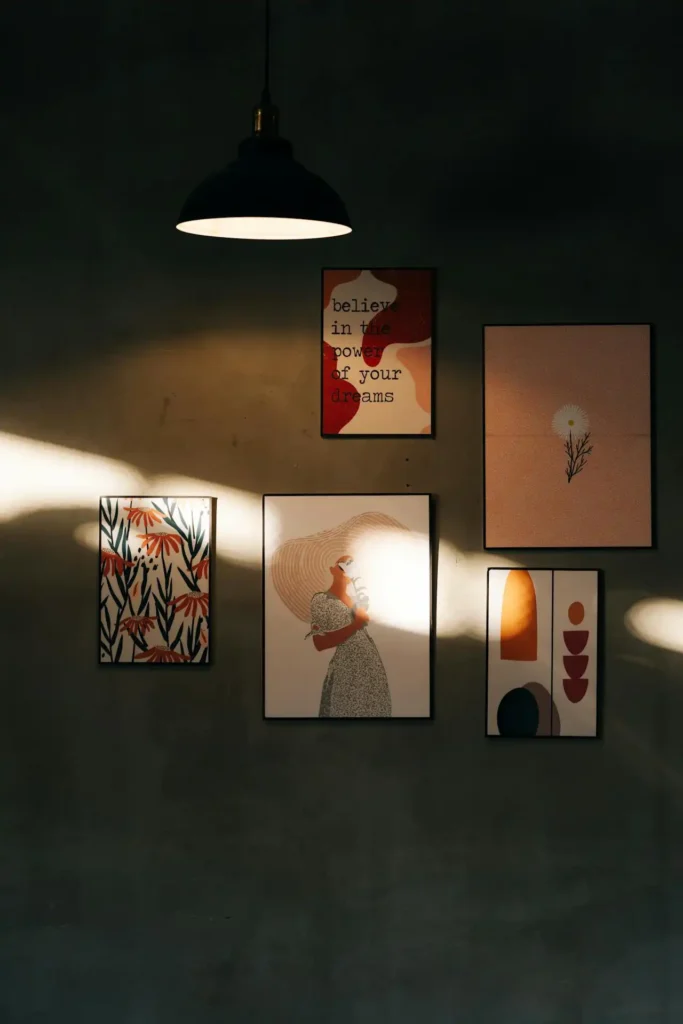
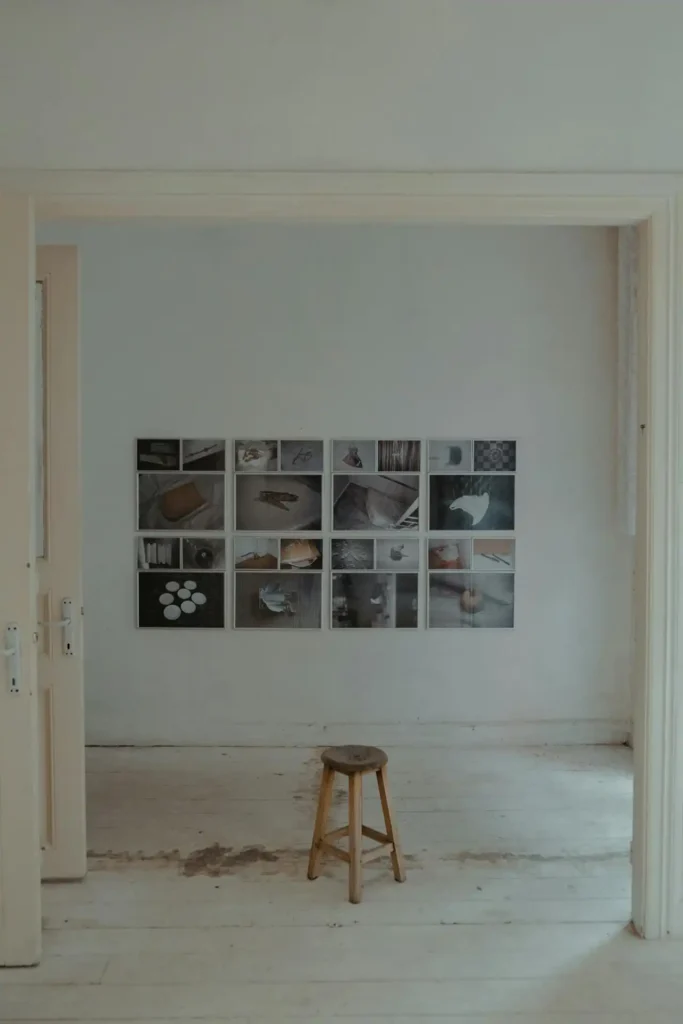
Mix different types of artwork for visual interest. This variety creates depth and prevents your wall from looking too uniform or boring.
Combine photographs with illustrations, paintings with typography, or vintage finds with modern prints.
Consider incorporating three-dimensional elements like small shelves, mirrors, or sculptural pieces.
These additions break up the flatness of traditional framed art and add another layer of visual texture to your display.
Don’t forget about frame styles. You can create cohesion by using frames in the same color family, or add eclectic charm by mixing different styles and finishes.
Just ensure there’s some connecting element – whether it’s color, material, or style – that ties everything together.
Collect more pieces than you think you’ll need. Having options allows you to experiment with different arrangements and replace pieces if something doesn’t work in the final layout.
Plan Your Layout Before Hanging
This step separates successful gallery walls from chaotic messes. Never start hanging pieces without a clear plan, or you’ll end up with holes in your wall and frustration in your heart.
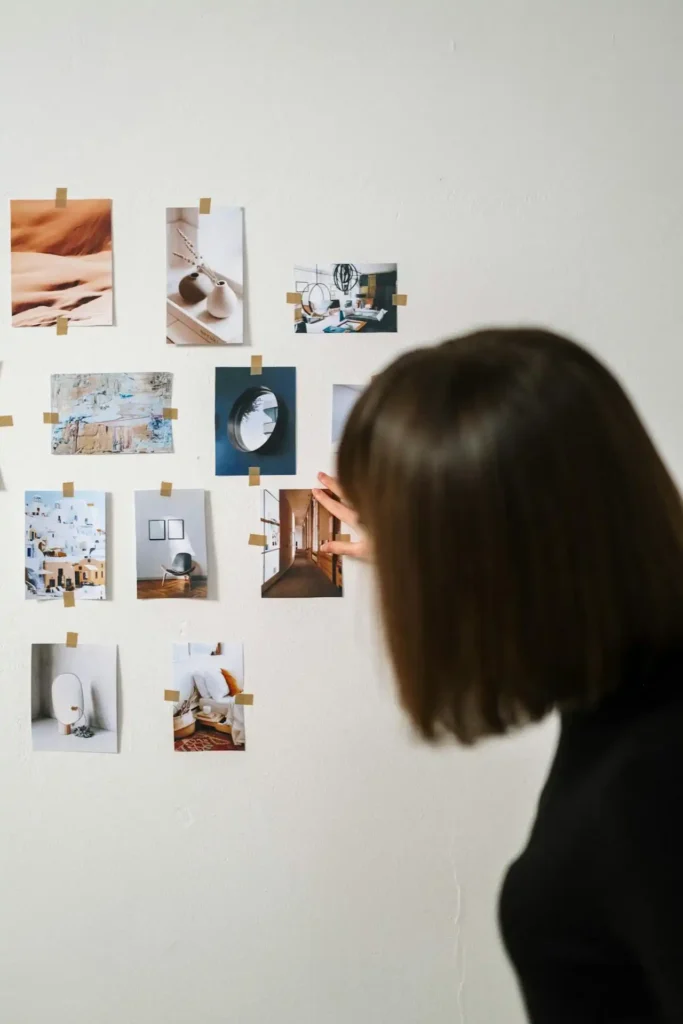
Cut paper templates that match each piece’s exact dimensions. This method lets you visualize the final result without any commitment.
Use painter’s tape to attach these templates to your wall, experimenting with different arrangements until you find one you love.
Start with your largest or most important piece as an anchor. Maintain consistent spacing between pieces.
This focal point should be positioned at eye level, typically 57-60 inches from the floor to the center of the piece. Everything else gets arranged around this anchor.
Most designers recommend 2-3 inches between frames, though you can adjust this based on your personal preference and the size of your pieces.
Consistent spacing creates a polished, intentional look. A large dark piece on one side might be balanced by several smaller pieces on the other side.
Balance is key, but it doesn’t mean symmetry. You can achieve visual balance by distributing visual weight evenly across the arrangement.
Take photos of your template arrangement from different angles. Sometimes what looks good up close doesn’t work from across the room.
These photos help you see the big picture and make adjustments before you start making holes in the wall.
Master the Installation Process
Proper installation ensures your gallery wall looks professional and stays secure for years to come. Invest in quality hanging hardware appropriate for your wall type and artwork weight.
For drywall, use picture hanging strips for lightweight pieces or wall anchors for heavier items.
If you’re hanging on plaster walls, pre-drill holes to prevent cracking. Always check that your hardware can support the weight of your artwork.
Install pieces from the center outward. Start with your anchor piece, then work on the pieces immediately surrounding it.
This approach helps you maintain proper spacing and alignment as you build out the arrangement.
Use a level for every single piece. Mark your nail or screw locations lightly with a pencil before making holes.
Even slight tilts become glaringly obvious when multiple frames are grouped together. A small bubble level or smartphone app can help you achieve perfect alignment.
Double-check these marks against your paper templates to ensure accuracy. It’s much easier to erase a pencil mark than to fill an unnecessary hole.
Consider installing a picture ledge or rail system if you like to change your display frequently. These systems let you easily swap out artwork without putting new holes in your wall.
Style Your Gallery Wall Like a Pro
The difference between an amateur gallery wall and a professional-looking one often comes down to styling details.
Pay attention to these finishing touches that elevate your display. Slight variations in height can add visual rhythm and keep the eye engaged.
Vary the heights and orientations of your pieces. Mix horizontal and vertical orientations, and don’t feel obligated to align every frame perfectly.
Include some negative space in your arrangement. You don’t need to fill every inch of wall space.
Strategic empty areas give the eye places to rest and prevent your gallery wall from feeling overwhelming.
Consider the story your pieces tell together. Group related items or create conversations between different pieces.
A vintage map might pair beautifully with travel photos, or abstract art could complement nature photography in unexpected ways.
Layer some pieces slightly in front of others if you’re using shelves or ledges. Add small decorative objects to break up the wall-mounted pieces.
This technique adds depth and makes your display feel more dynamic and lived-in rather than flat and static.
A small plant on a floating shelf, a decorative clock, or a sculptural element can add personality and prevent your gallery wall from looking too predictable.
Avoid Common Gallery Wall Mistakes
Learning from others’ mistakes saves you time and frustration. These common pitfalls can make or break your gallery wall project.
Don’t hang everything too high. Many people instinctively hang artwork higher than necessary, creating a disconnected feeling between the art and the furniture below.
Keep your gallery wall visually connected to the room’s other elements. Avoid making your arrangement too small for the wall space.
A tiny cluster of frames on a large wall looks lost and insignificant. If your initial collection seems too small, either expand the arrangement or choose a different wall.
Don’t ignore the room’s scale and proportions. Resist the urge to match everything perfectly.
Massive frames can overwhelm a small room, while tiny pieces might get lost in a grand space. Your gallery wall should feel proportionate to its surroundings.
While cohesion is important, too much uniformity creates a boring, hotel-like appearance. Embrace some controlled chaos and personality in your choices.
Don’t forget about lighting. Even the most beautiful gallery wall can look flat and uninspiring in poor lighting.
Consider adding picture lights, adjusting existing fixtures, or repositioning the arrangement to take advantage of better natural light.
Add the Finishing Touches
Once your main arrangement is complete, step back and assess what might be missing. Sometimes a gallery wall needs just one or two additional elements to feel complete and polished.
Consider adding LED strip lighting behind frames for a modern, museum-like effect. This subtle backlighting creates depth and makes your artwork appear to float slightly off the wall.
Include a small plant or two if your arrangement incorporates shelving. Living elements soften the hard edges of frames and add natural color that complements almost any artwork.
Think about seasonal updates. Gallery walls are perfect canvases for rotating seasonal pieces, holiday cards, or artwork that reflects the changing year.
Plan your arrangement to accommodate these future additions. Document your finished gallery wall with photos.
These images help you recreate the arrangement if you ever need to take it down temporarily, and they’re perfect for sharing your success with friends and family.
Maintain Your Gallery Wall Over Time
Your gallery wall isn’t a static installation – it should evolve with your life and changing tastes. Regular maintenance keeps it looking fresh and personally meaningful.
Dust your frames and artwork regularly. A soft, dry cloth or feather duster works well for most pieces. For glass-covered artwork, use a glass cleaner sparingly to avoid moisture damage.
Rotate pieces seasonally or when you acquire new artwork. This keeps your gallery wall feeling current and prevents you from getting bored with the display.
Check your hanging hardware periodically. Wall anchors can loosen over time, and picture wire can deteriorate. A quick inspection every few months prevents accidents and damage.
Consider expanding your gallery wall gradually. As you find new pieces you love, you can extend the arrangement or create satellite groupings nearby.
This organic growth often creates more interesting displays than trying to plan everything at once.
Conclusion
Your blank wall transformation is now complete, creating a personalized focal point that tells your unique story while elevating your entire space.